DIY Pet Bowtie
Published September 4, 2020
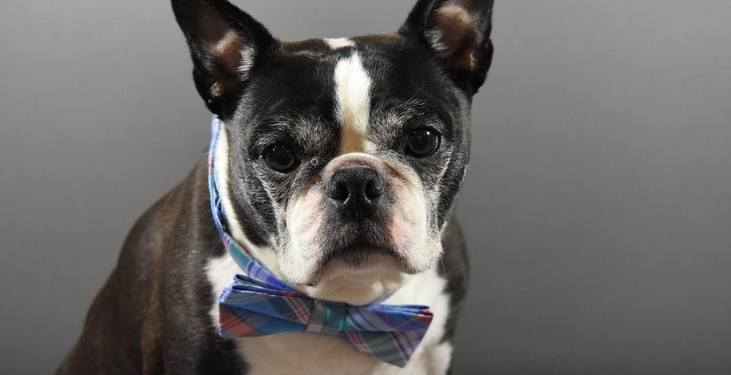
You don’t need to spend a fortune for your pet to look stylish! Here’s an easy, no-sew tutorial for a pet bowtie you can make with fabric scraps around the house.
What you’ll need:
- Fabric
- Ribbon
- Ruler
- Scissors
- Hot glue gun or fabric glue
Instructions:
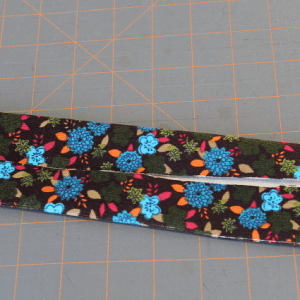
- First, cut a 4.5X9” piece of fabric. Once the fabric is cut, fold it lengthwise on both sides towards the middle.
- Fold the ends toward the middle and glue the edges to the inside of the bow.
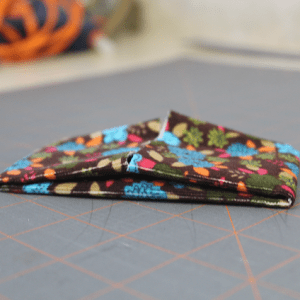
- Pinch the bow in the middle so that there are 2 folds.

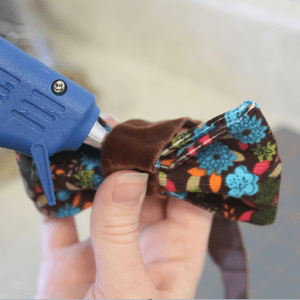
- Glue between the folds.
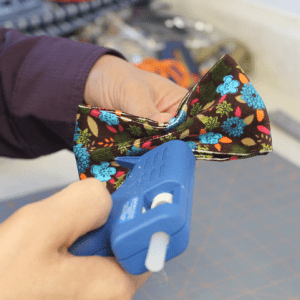
- Glue the ribbon to the back of the bow. Alternatively, you can use a strip of fabric. Wrap around. When the ribbon reaches the back of the bow, glue to secure.
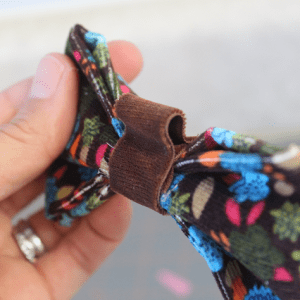
- Fold the ribbon to create a loop for your pet’s collar. Once you have determined the length that will fit your pet’s collar, glue the end of the loop to the back of the bow to close the loop. Then, cut the excess ribbon.
Your bowtie is finished and ready to be worn!
Show us how it looks on your spiffy pet by tagging @EssentialsPetCare on Facebook and Instagram and @EssentialsPet on Twitter with the hashtag #PetBowTie.
Note: the bowtie should only be worn under your supervision. For your pet’s safety, do not leave the bowtie on your pet unattended.